Install Arch GNU/Linux using archfi
Motivation
On my main workstation at home, I use Arch GNU/Linux and installed it using the great Arch installation guide . If you do not install arch very often, it helps but is not the most efficient way.
However I did not install Arch using the vanilla Arch style on my Laptop or second desktop. I used the Arch derivate Antergos. I really liked it as it was built on the original Arch repositories and only had one additional custom repository. As you might know, Antergos shut down not long ago.
I took to opportunity to test some other distributions. Manjaro and ArcoLinux were two of them. I do not like both at all as I had trouble using the installer on both and on two different systems. I managed to install them but they did not fit to my style. Don’t get me wrong. These are good distributions but they simply do not work the way I like.
I like to have a vanilla Arch installation but I am too lazy to do all by hand, just by following the Wiki again. So I searched for another way to set up Arch.
This blog post should show you the way I took and help to get an idea how Arch may get installed by using the original install environment and a script. It shows some detail but does not provide each keystroke. You have to read and think for yourself when going through this installation.
archfi - Arch Fast Install
I found a wonderful bash script called Archfi (Arch Fast Install) .
Starting installation
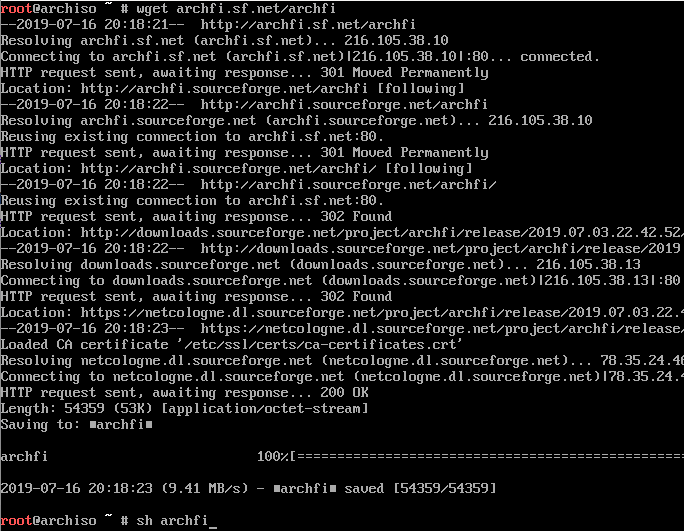
After starting Arch from the installation media, make sure your network connection works. When ready, just download the install script and launch it.
wget archfi.sf.net/archfi
sh archfi
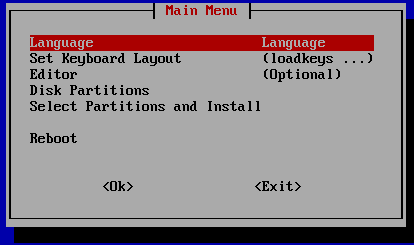
Now you get the the main screen where all the fun starts. Configure the keyboard, select the language and the editor, if you do not like nano.
Partition the disk
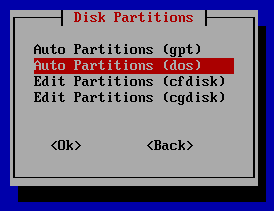
Nex you should partition your disk to support your installation. I selected the dos version on my legacy system and the gpt on my newer machine. This depends on your setup.
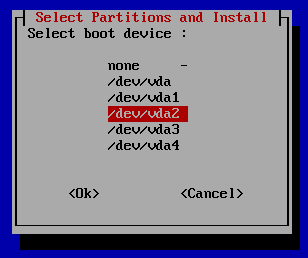
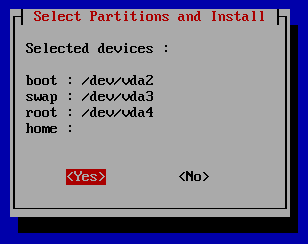
The gpt version created 4 partitions. The first seems to be an empty placeholder to align some parts. The vda2 is the boot partition, vda3 the swap and vda4 the root. If you just hit enter, the right partition gets selected for each mount point as the appear in this order. This point should definitely get an improvement.
Finally you get a confirmation of the selected partitions. And yes, home has none in the default setup. If you like to have home on a different partition, you have to this by hand.
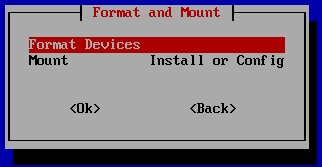
To make the partitions usable, you have to format them. For UEFI you should format boot with the FAT32 file system or it will not work. Swap has no real option and for root I took ext4 on my system. Feel free to use what you like.
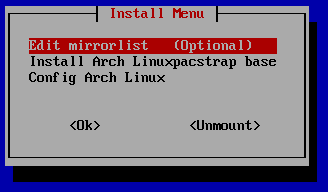
Install the base system
Now the base system gets installed to the machine. After this the system contains only the very base arch installation without any additional software. Even the boot loader is missing at this point.
Configure the fresh system
After bootstrapping, you get a menu to configure all the things required for your basic arch installation. You may just hit “Enter” on the first menu entry and when you return from the action, the next entry is already preselected. Just work through all points to the end of the list.
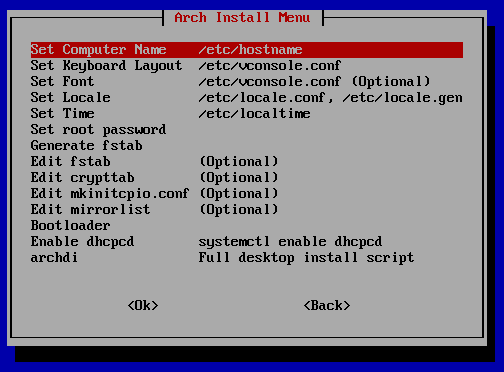
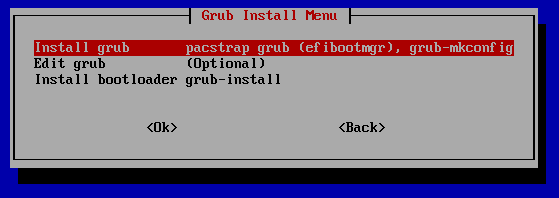
I use grub as the bootloader of my system. It’s just two steps to finish it’s installation.
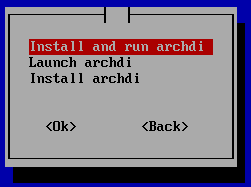
Now the basesystem is installed and if you like to do the rest without a script, you may select back after enabling dhcp. If you like to install a graphical desktop system, you may continue by starting the archdi script.
archdi - Arch Desktop Install
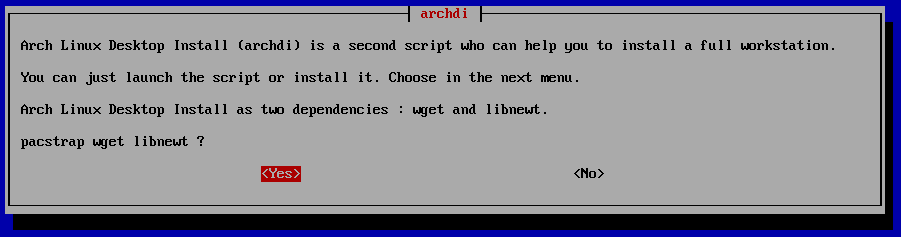
When selecting “archdi” you get prompted to install the packages wget and libnewt to use the script and run it within the newly created installation.
Nex you get the main screen of the “archdi” installation script. Hit “Enter” on the first point to start the installation.
Install tools and dependencies
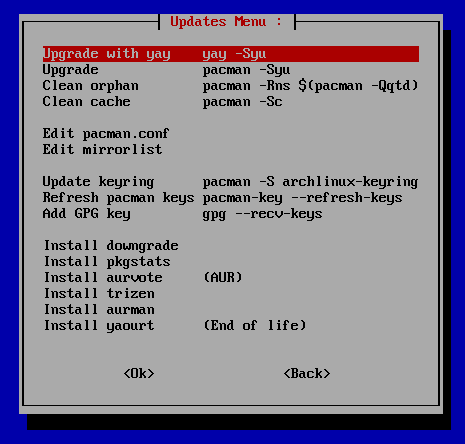
Next you configure the updates and install some tools like pacman-contrib, yay and downgrade to handle aur packages. Yay handles AUR packages as well.
After installing these two additional packages, I update the keyring and refresh all the keys. This helps to avoid failing signature checks on packages.
As last step on this page, I install the tool downgrade as it may be very useful if you have a package that causes some troubles and it is easy to downgrade to the previous version. If you have a nvidia graphics card, I highly recommend installing downgrade.
Installing console applications
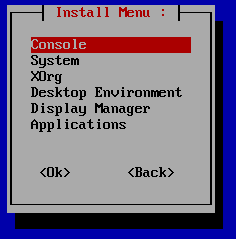
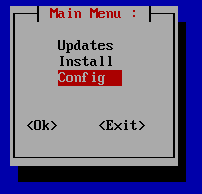
Now back on the main menu I select “install” to get to the following screen. Here you may select some applications from these categories to be installed. I usually go from one point to the other and install the tools I like. Mostly the preselected items ok. You may change them if you like. After finishing the console and system installation, the GUI awaits you.
Installing X11
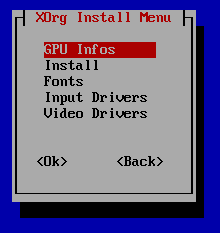
To make any GUI work, you need to have a running X11 installation. This is split in multiple parts. The first point shows you what GPU was detected by the Linux kernel during boot. This helps you to choose the right driver later. To run the XOrg installation, I just keep the two preselected packages. From the “Fonts” menu I installed all of them, even if I do not need them all ;-) I also kept the default selection for the “Input drivers” as for my systems this is all you need.
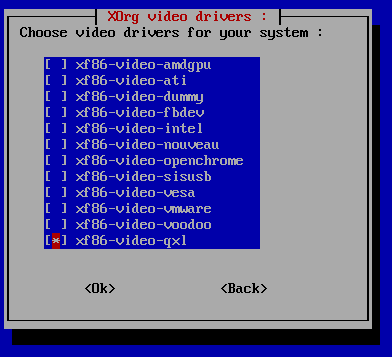
Finally the important part. Choose the display driver. As I did this installation in a KVM with QXL as display adapter, I have to choose the appropriate driver from the open source category here.
Install Desktop environment
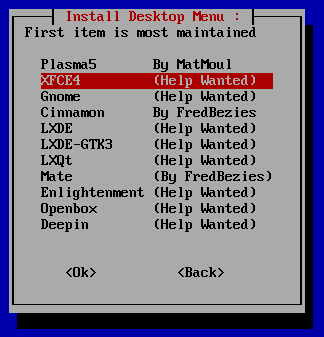
With the X11 installation finished, we now can choose our desktop environment. I take XFCE4 with all the additions and extra packages for this tutorial.
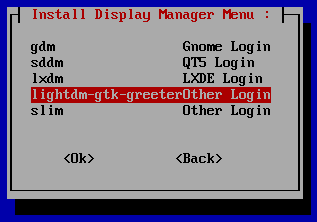
Finished the XFCE installation, the only thing to do is to configure the graphical display manager with the login prompt. I use the lightdm-gtk-greeter here.
After this, the installer let you install some additional applications like webbrowsers or office suites. Just go through the menus and install the apps you like. You may also install any of them later but it is just a nice to have thing that makes the system more complete after your first boot.
Final configuration
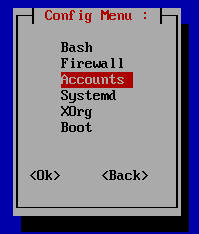
Finally you are able to do some configuration stuff before rebooting into you new system.
I recommend at least to create a new personal user account to work with. Root is not an ideal user to login ;-)
Do not forget to add your new user to the sudoers list to be able to use sudo commands.
If you have some special services to start, you may enable them within the systemd menu. I recommend to start with the least amount of services and enabled them on the running system as soon as they are needed.
After configuring your system, you may hit Back / Exit to return to the last archfi script page.
Reboot into your new Arch installation
The last step is to hit Back until you get back to the main menu where you have to option to reboot the machine. On the way back the action is once called unmount as you leave the new system and return to the running live version.
After rebooting the machine, you have a fully installed Arch GNU/Linux booting to a graphical login screen ready to use. Yes, there are more things to customize your system but you now have a good starting point. The nice thing is that you do not miss any steps. It also takes not that much time using this nice little script.
Conclusion
Such an installation is still not as fast and easy as using something like ArcoLinux or one of the Ubuntu based desktop distributions. On the other hand, you have many reminder points what to do, that could get lost when just following the wiki pages and you do not have to do each step by hand.
I installed the system of this tutorial within about two hours and I had to take all the screen shots and wrote this post during this time as well. Ok, I added some more minutes to review and fix some little issues within this post :-)
I love having a vanilla Arch. Why? Because you have the real Arch stuff without any addition that may be missing from one day to another. I use Arch now for more than two years and I never had the feeling to go back to my previous distribution.
I wrote about a desktop installation. Speaking of servers? This is another story :-) Probably there will be a blog post in the future, why I leave ubuntu to go back to the debian or centos for my server installations.